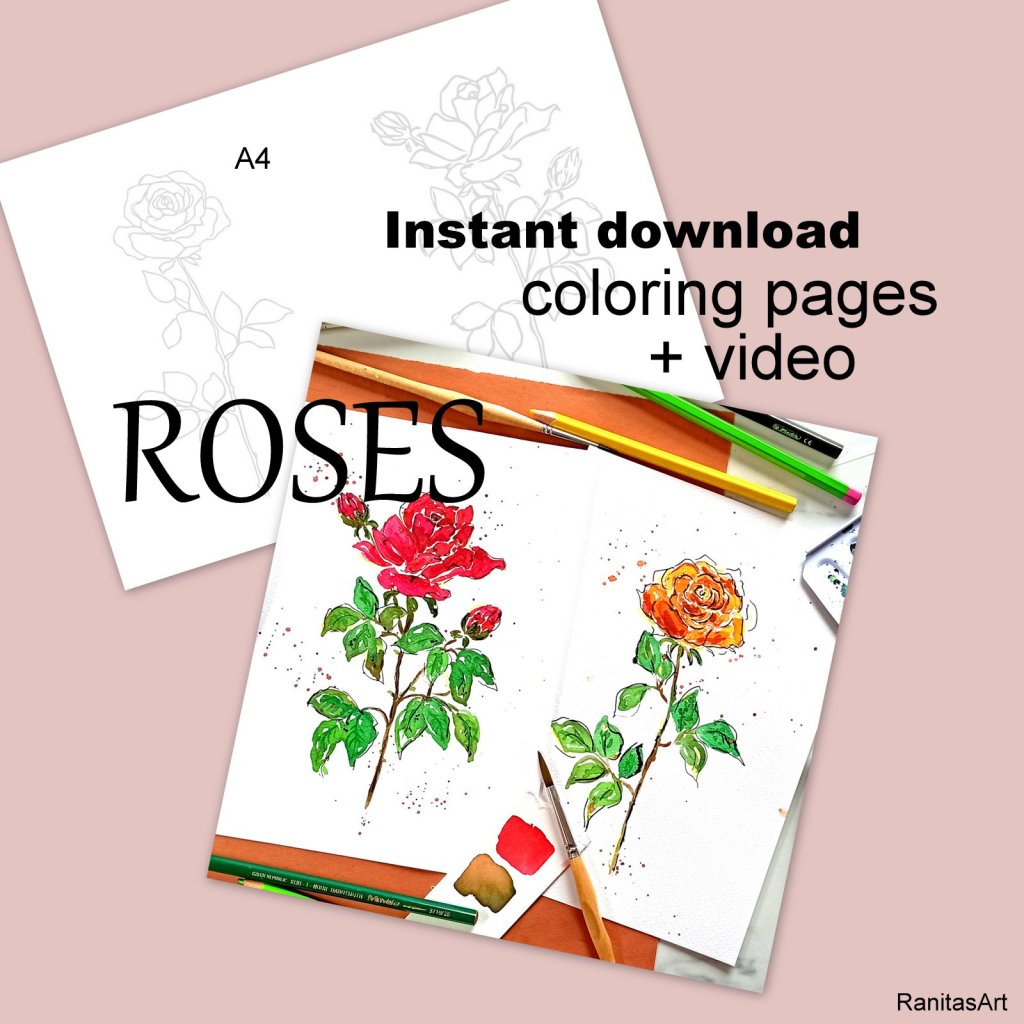
ES → en el post de hoy les muestro paso a paso como dibujar y pintar rosas botánicas. Primero vamos a realizar el boceto en lápiz y luego vamos a pintarlas con acuarelas. También preparé los sketch para que puedan descargarlos y pintar directamente. Disfruten del vídeo !
EN → in today’s post I show you step by step how to draw and paint botanical roses. First we are going to make the sketch in pencil and then we are going to paint them with watercolors. I also prepared the sketches so you can download them and paint directly. Enjoy the video!
DE → im heutigen Beitrag zeige ich dir Schritt für Schritt, wie man botanische Rosen zeichnet und anmalt. Zuerst machen wir eine Skizze mit Bleistift und dann malen wir sie mit Wasserfarben an. Ich habe auch die Skizzen vorbereitet, damit Ihr sie herunterladen und direkt anmalen könnt. Genieße das video!
ES → también preparé una carpeta en pinterest con diferentes rosas para que puedan buscar inspiración. Las acuarelas que más me gustan para trabajar son las de Schminke o Winsor and Newton y utilizé pinceles de tamaño 1 y 6.
EN → I also prepared a board on Pinterest with different roses so you can look for inspiration. The watercolors I like the most to work with are Schminke or Winsor and Newton and I used size 1 and 6 brushes.
DE → Ich habe auch einen Ordner auf Pinterest mit verschiedenen Rosen vorbereitet, damit Ihr nach Inspiration suchen könnt. Die Aquarellfarben, mit denen ich am liebsten arbeite, sind Schminke oder Winsor und Newton und ich habe Pinsel der Größe 1 und 6 verwendet.
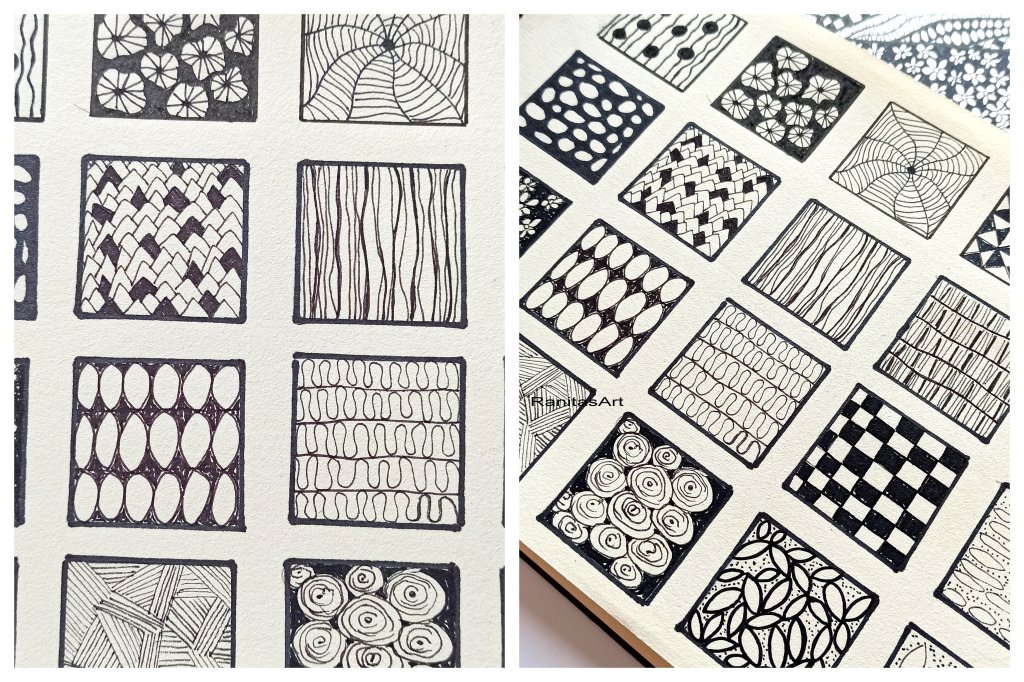
ES → hoy les trago un vídeo del paisaje de montaña nr. 3, donde les muestro paso a paso diferentes maneras de rellenar cada división con Zen doodles / Zentangles.
El arte zentangle consiste en realizar patrones simples a complejos en áreas pequeñas. Se llama Zen porque es un arte relajante que se centra en la concentración. Se pueden encontrar miles de ejemplos en internet, yo les dejo una carpeta con ejemplos en pinterest.
EN → today I bring you a video of the mountain landscape nr. 3, where I show you step by step different ways to fill each division with Zen doodles / Zentangles.
Zentangle art is about making simple to complex patterns on small surfaces. It is called Zen because it is a relaxing art that focuses on concentration. You can find thousands of examples on the internet, I leave you a folder with examples on Pinterest.
DE → Heute zeige ich euch ein Video der Berglandschaft Nr. 3, wo ich euch Schritt für Schritt verschiedene Möglichkeiten zeige, jede Abteilung mit Zen-Doodles / Zentangles zu füllen.
Bei der Zentangle-Kunst geht es darum, einfache bis komplexe Muster auf kleinen Flächen herzustellen. Man nennt es Zen, weil es eine entspannende Kunst ist, die sich auf die Konzentration fokussiert. Sie können Tausende von Beispielen im Internet finden, ich hinterlasse euch einen Ordner mit Beispielen auf Pinterest.
ES → Preparé un descargables con los 5 paisajes de montañas, para que puedan pintarlas. Hay tres vídeos terminados para que puedan pintarlos. Cada paisaje es pintado con otro medio o técnica.
EN → I prepared a downloadable with the 5 mountain landscapes, so you can paint them. There are three finished videos so you can paint them. Each landscape is painted with another medium or technique.
DE → Ich habe eine herunterladbare Datei mit den 5 Berglandschaften vorbereitet, damit Ihr sie anmalen könnt. Es gibt schon drei fertige Videos. Jede Landschaft wird mit einem anderen Medium oder einer anderen Technik gemalt.
ES → al principio del vídeo les muestro algunos ejemplos de Zen doodles, luego vamos a pintar el paisaje, en la parte inferior vamos a rellenar el dibujo con Zentangles y en la parte superior vamos a pintar con acuarelas, marcadores y lápices.
EN → at the beginning of the video I show you some examples of Zen doodles, then we are going to paint the landscape, at the bottom we are going to fill the drawing with Zentangles and at the top we are going to paint with watercolors, markers and pencils.
DE → Am Anfang des Videos zeige ich euch einige Beispiele für Zen-Kritzeleien, dann malen wir die Landschaft, unten füllen wir die Zeichnung mit Zentangles und oben malen wir mit Wasserfarben, Marker und Bleistifte.
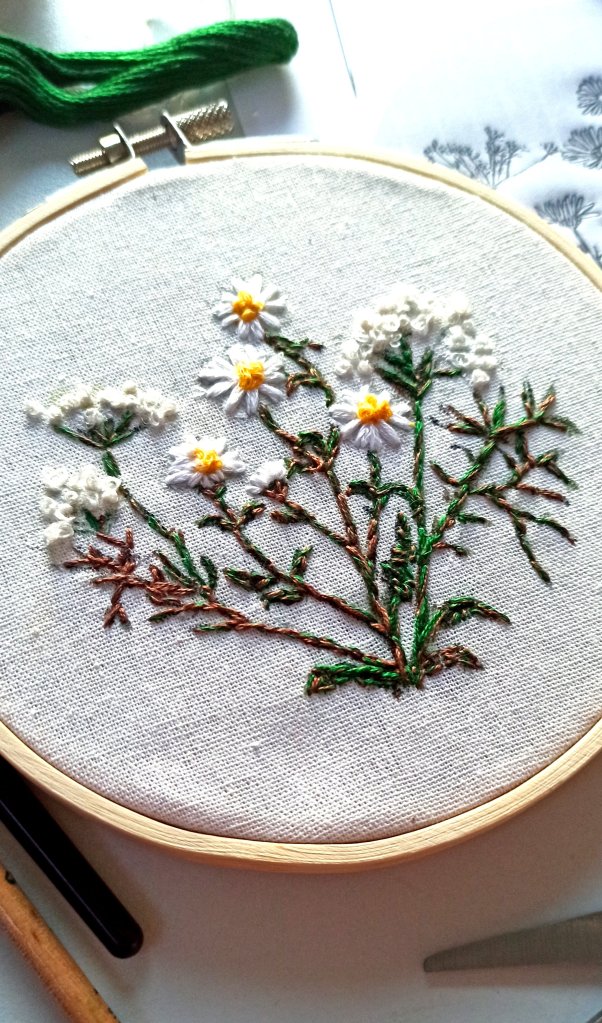
ES → hoy preparé un tutorial paso a paso donde les muestro como pintar y bordar margaritas botánicas. Es un trabajo muy sencillo de realizar donde solo usamos dos tipos de puntos. Primero vamos a pintar con acrílicos todo el diseño y luego vamos a bordarlo. Pintar todo el dibujo primero genero un efecto muy natural y orgánico.
EN → Today I prepared a step-by-step tutorial where I show you how to paint and embroider botanical daisies. It is a very simple job to do where we only use two types of points. First we are going to paint the entire design with acrylics and then we are going to embroider it. Painting the entire drawing first generated a very natural and organic effect.
DE → Heute habe ich eine Schritt-für-Schritt-Anleitung vorbereitet, in der ich euch zeige, wie man botanische Margariten malt und stickt. Es ist eine sehr einfache Aufgabe, bei der wir nur zwei Arten von Punkten verwenden. Zuerst malen wir das gesamte Design mit Acrylfarben und dann sticken wir es. Das Malen der gesamten Zeichnung erzeugte zunächst einen sehr natürlichen und organischen Effekt.
ES → les dejo en la tienda el diseño para que puedan descargarlo en diferentes tamaños. Yo utilizé un aro de 13 cm de diámetro. Para realizar el trabajo van a nesecitar : un aro de bordado, acrílicos y pinceles finos , hilo y aguja para bordar, tijera, lapiz, papel carbón y tela de algodón o lino.
EN → I leave the design in the store so you can download it in different sizes. I used a 13 cm diameter ring. To carry out the work you will need: an embroidery hoop, acrylics and fine brushes, embroidery thread and needle, scissors, pencil, carbon paper and cotton or linen fabric.
DE → Ich lasse das Design im Store damit Ihr es in verschiedenen Größen herunterladen könnt. Ich habe einen Ring mit 13 cm Durchmesser verwendet. Für die Arbeit benötigt Ihr: einen Stickrahmen, Acrylfarben und feine Pinsel, Stickgarn und -nadel, Schere, Bleistift, Kohlepapier und Baumwoll- oder Leinenstoff.
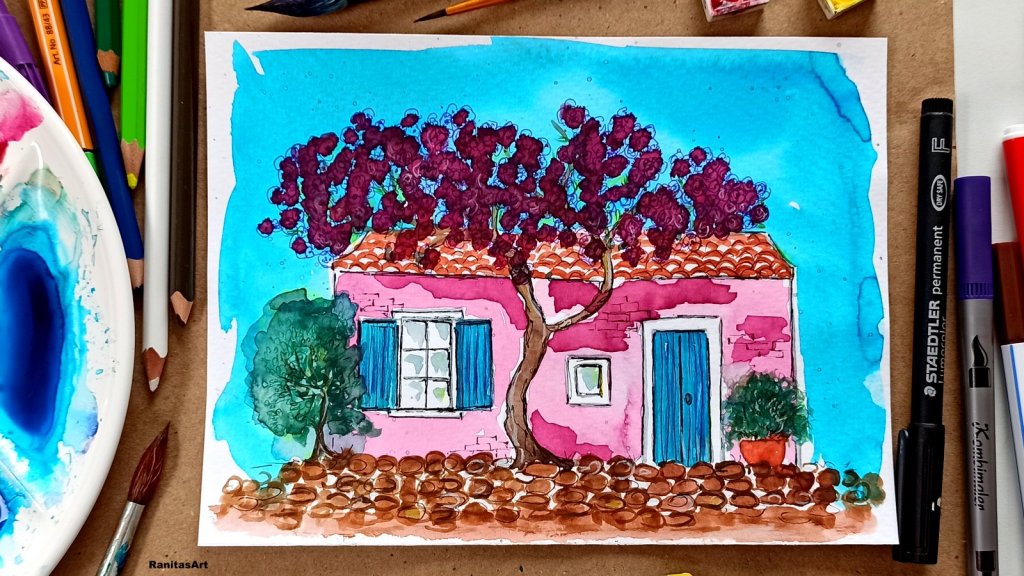
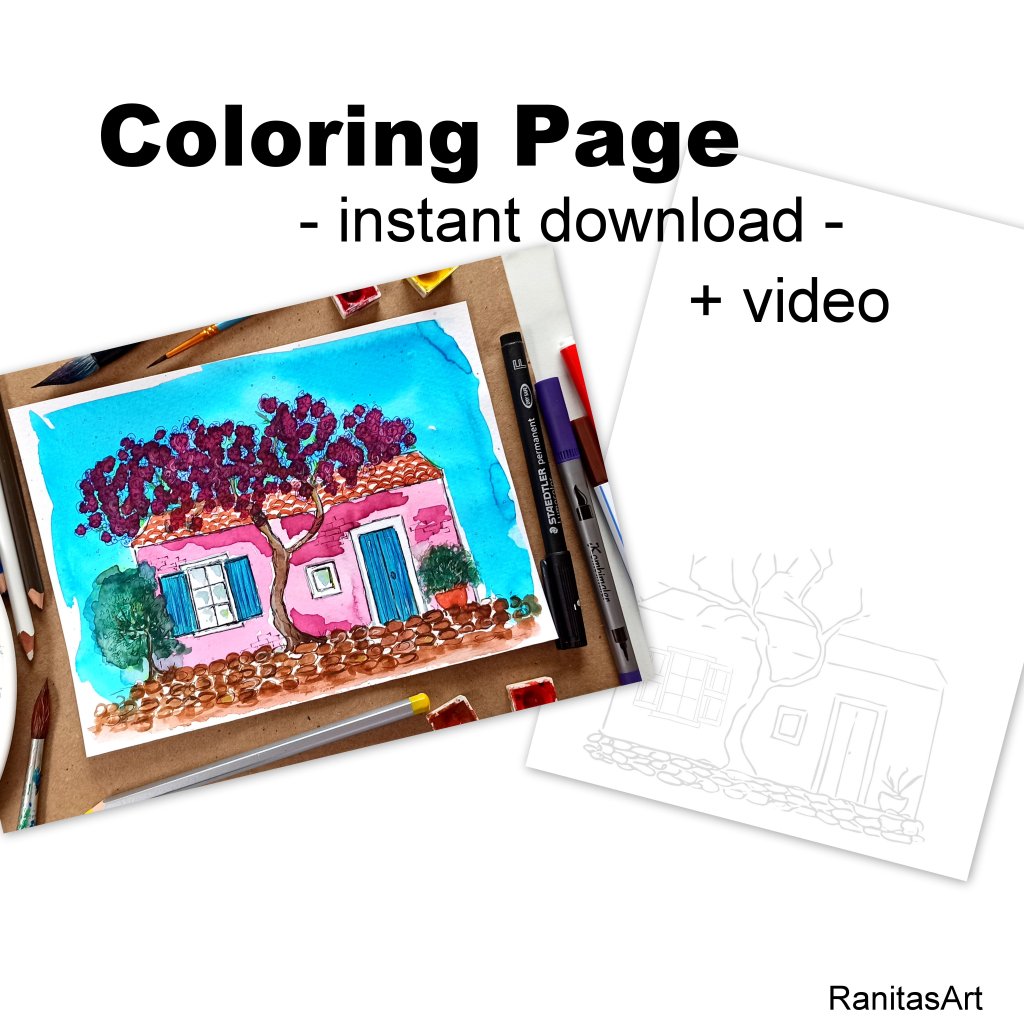
ES → En el Post de hoy les traigo un vídeo paso a paso de una casita con un árbol en flor. Muy sencillo de pintar e ideal para esta primavera verano. Disfruten del vídeo ♥ !
EN → In today’s Post I bring you a step-by-step video of a little house with a flowering tree. Very easy to paint and ideal for this spring summer. Enjoy the video ♥!
DE → Im heutigen Beitrag präsentiere ich euch ein Schritt-für-Schritt-Video eines kleinen Hauses mit einem blühenden Baum. Sehr einfach zu bemalen und ideal für diesen Frühlingssommer. Viel Spaß mit dem Video ♥!
ES → les dejo también el boceto descargable en la tienda. En Pinterest cree un Board donde les dejo muchas ideas de hermosas casitas, puertas y ventanas.
EN → I also leave you the downloadable sketch in the store. On Pinterest I created a Board where I leave you many ideas of beautiful houses, doors and windows.
DE → Ich hinterlasse euch auch die herunterladbare Skizze im Store. Auf Pinterest habe ich ein Board erstellt, auf dem ich euch viele Ideen mit schöne Häuser, Türen und Fenster hinterlasse.
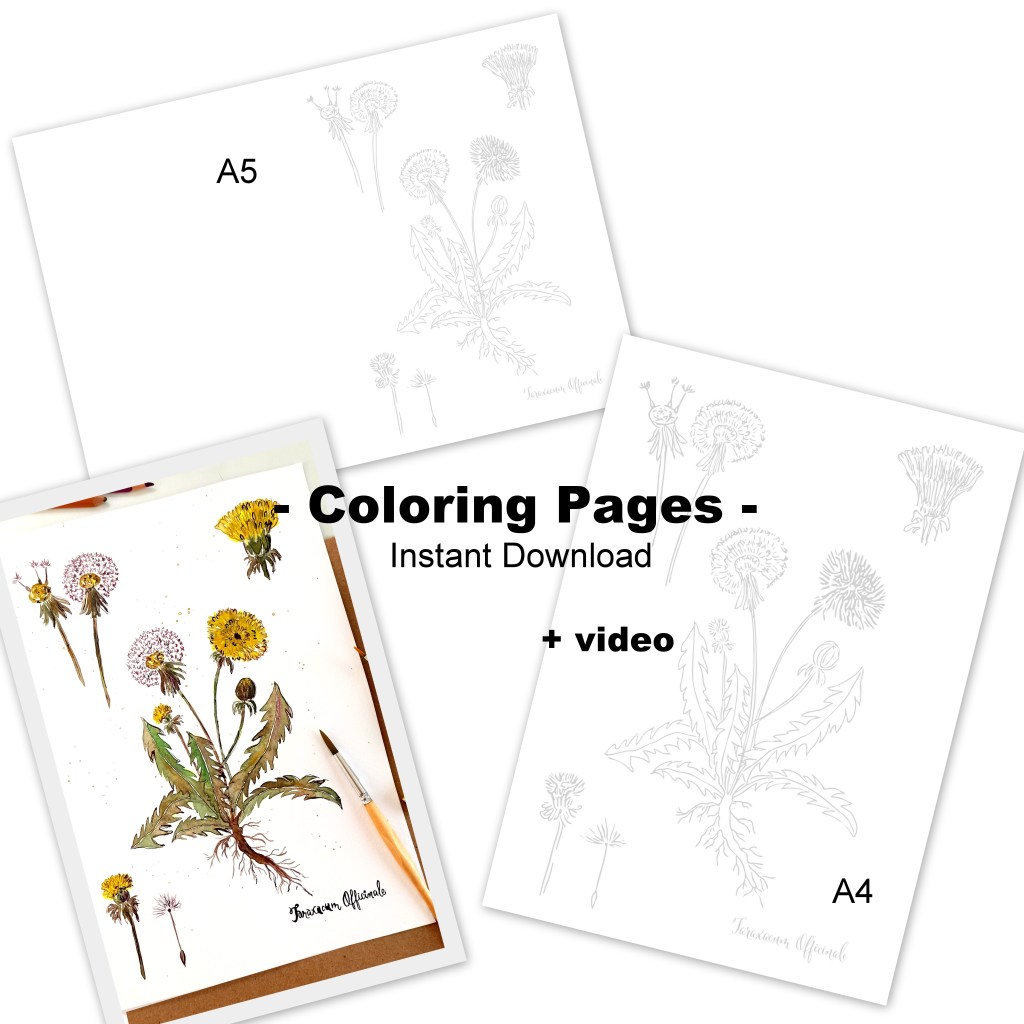
ES → en el post de hoy les quiero enseñar está hermosa lámina botánica de la planta diente de león. Preparé un video donde pueden ver paso a paso como dibujar y pintar la planta de forma botánica.
EN → In today’s post I want to show you this beautiful botanical painting of the dandelion plant. I prepared a video where you can see step by step how to draw and paint the plant botanically.
DE → Im heutigen Beitrag möchte ich euch diesen wunderschönen botanische Malerei der Löwenzahnpflanze zeigen. Ich habe ein Video vorbereitet, in dem Ihr Schritt für Schritt sehen könnt, wie man die Pflanze botanisch zeichnet und anmalt.
ES → en el video les muestro paso a paso como dibujar su propio boceto y luego como pintar paso a paso el dibujo. También preparé un boceto, listo para pintar, que pueden descargar en la tienda.
EN → in the video I show you step by step how to draw your own sketch and then how to paint the drawing step by step. I also prepared a sketch, ready to paint, which you can download in the store.
DE → Im Video zeige ich euch Schritt für Schritt, wie Ihr eure eigene Skizze zeichnest und wie Ihr die Zeichnung dann Schritt für Schritt ausmalt. Ich habe auch eine fertige Skizze zum Ausmalen vorbereitet, die Ihr im Shop herunterladen könnt.
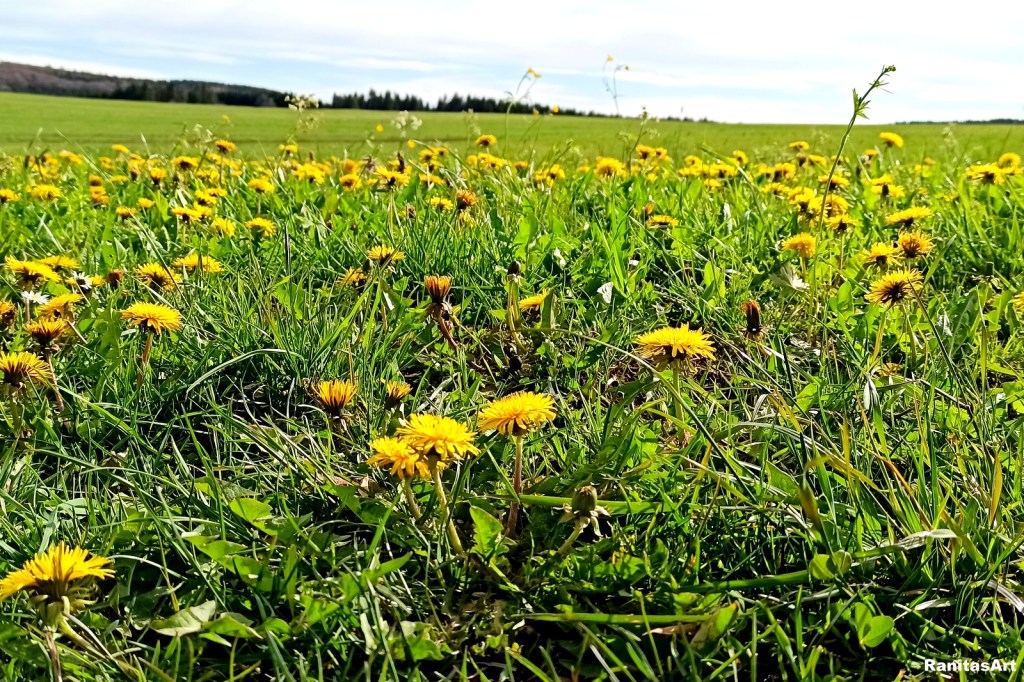
ES → Mayo ( en Europa ) es el mes ideal para encontrar flores de diente de león por todas partes. Son unas hermosas plantas que cubren los campos y los caminos de flores amarillas, además de ser plantas medicinales. Se pueden encontrar cientos dibujos botánicos sobre esta planta. En pinterest tablero → diente de león
EN → May (in Europe) is the ideal month to find dandelion flowers everywhere. They are beautiful plants that cover the fields and paths with yellow flowers, in addition to being medicinal plants. You can find hundreds of botanical drawings about this plant. On pinterest board → dandelion
DE → Der Mai (in Europa) ist der ideale Monat, um überall Löwenzahnblüten zu finden. Es sind wunderschöne Pflanzen, die Felder und Wege mit gelben Blüten bedecken und außerdem Heilpflanzen sind. Ihr könnt Hunderte von botanischen Zeichnungen über diese Pflanze finden. Auf Pinterest-Board → Löwenzahn
ES → Materialesnecesarios :
Descargables o propios sketch
Acuarelas ( porej. de Winsor and Newton o similar )
Papel para acuarelas de 180 gr. a 300 gr. ( porej. Hahnemühle o similar )
Pincel mediano nr. 6 y fino Nr. 1 de punta redonda
agua limpia
papel de cocina
tinta negra y marrón
pluma
lapiz
papel para practicar
lapices de colores
goma de borrar
EN → Materialspor painting:
Downloadable or own sketch
Watercolors (e.g. Winsor and Newton or similar)
180 gr watercolor paper. at 300 gr. (e.g. Hahnemühle or similar)
Medium brush no. 6 and fine Nr. 1 round tip
clean water
kitchen paper
black ink and brown
feather
pencil
practice paper
colored pencils
eraser
DE → Materialienzum malen:
Downloads oder eigene Skizze
Aquarelle (z. B. Winsor und Newton oder ähnlich)
180 g Aquarellpapier. bei 300 gr. (z.B. Hahnemühle o.ä.)
ES → les recomiendo que miren el video una vez completo y luego vuelvan a mirarlo paso a paso haciendo pausas, para poder seguir los pasos correctamente .
EN → I recommend that you watch the video once in its entirety and then watch it again step by step, pausing, to be able to follow the steps correctly.
DE → Ich empfehle euch, das Video einmal vollständig anzusehen und es dann Schritt für Schritt noch einmal mit Pause anzusehen, um die Schritte richtig befolgen zu können. Genießt das Video.
Otro vídeo / another video / noch ein Video
ES → este vídeo lo realizé hace unos años, fué uno de mis primero vídeos, donde pinto un diente de león sin boceto previo, es un video corto, Timelapse, solo con música. Me gusta muchisimo pintar sin boceto previo, los dibujos no salen tan prolijos, pero el resultado es hermoso porque uno no sabe como va a quedar y se disfruta muchisimo del proceso. Miren el vídeo, pruebenlo y cuentenmé cual de las 2 versiones disfrutaron más.
EN → I made this video a few years ago, it was one of my first videos, where I paint a dandelion without a prior sketch, it is a short video, Timelapse, only with music. I really like to paint without a prior sketch, the drawings don’t come out as neat, but the result is beautiful because you don’t know how it will turn out and you really enjoy the process. Watch the video, try it and tell me which of the 2 versions you enjoyed the most.
DE → Ich habe dieses Video vor ein paar Jahren gemacht, es war eines meiner ersten Videos, in dem ich ohne vorherige Skizze einen Löwenzahn male, es ist ein kurzes Video, Timelapse, nur mit Musik. Ich male sehr gerne ohne vorherige Skizze. Die Zeichnungen kommen nicht so sauber heraus, aber das Ergebnis ist schön, weil man nicht weiß, wie es ausgehen wird, und man den Prozess wirklich genießt. Schaut euch das Video an, probiert es aus und sagt mir, welche der beiden Versionen euch am besten gefallen hat.
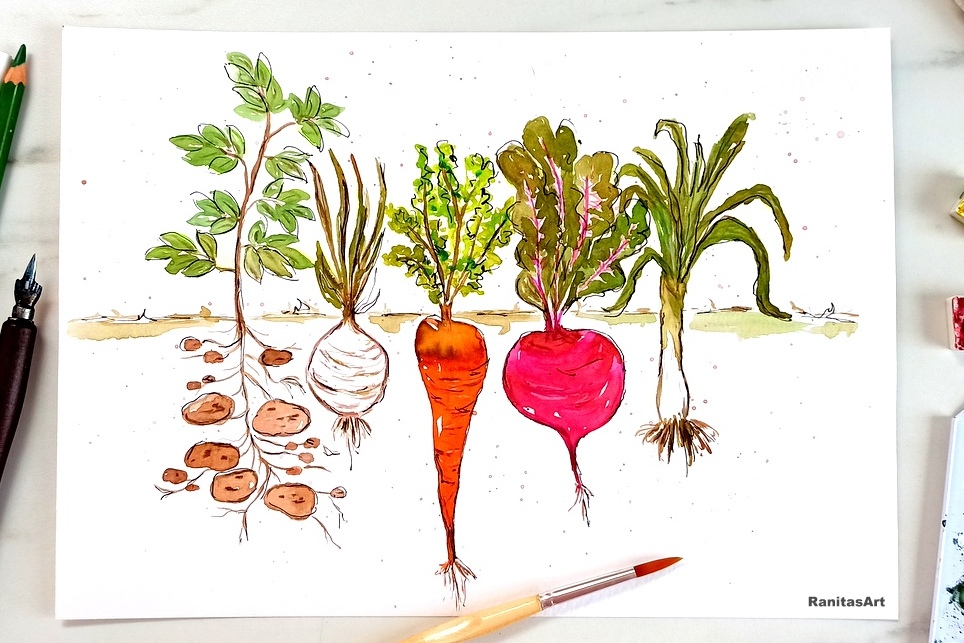
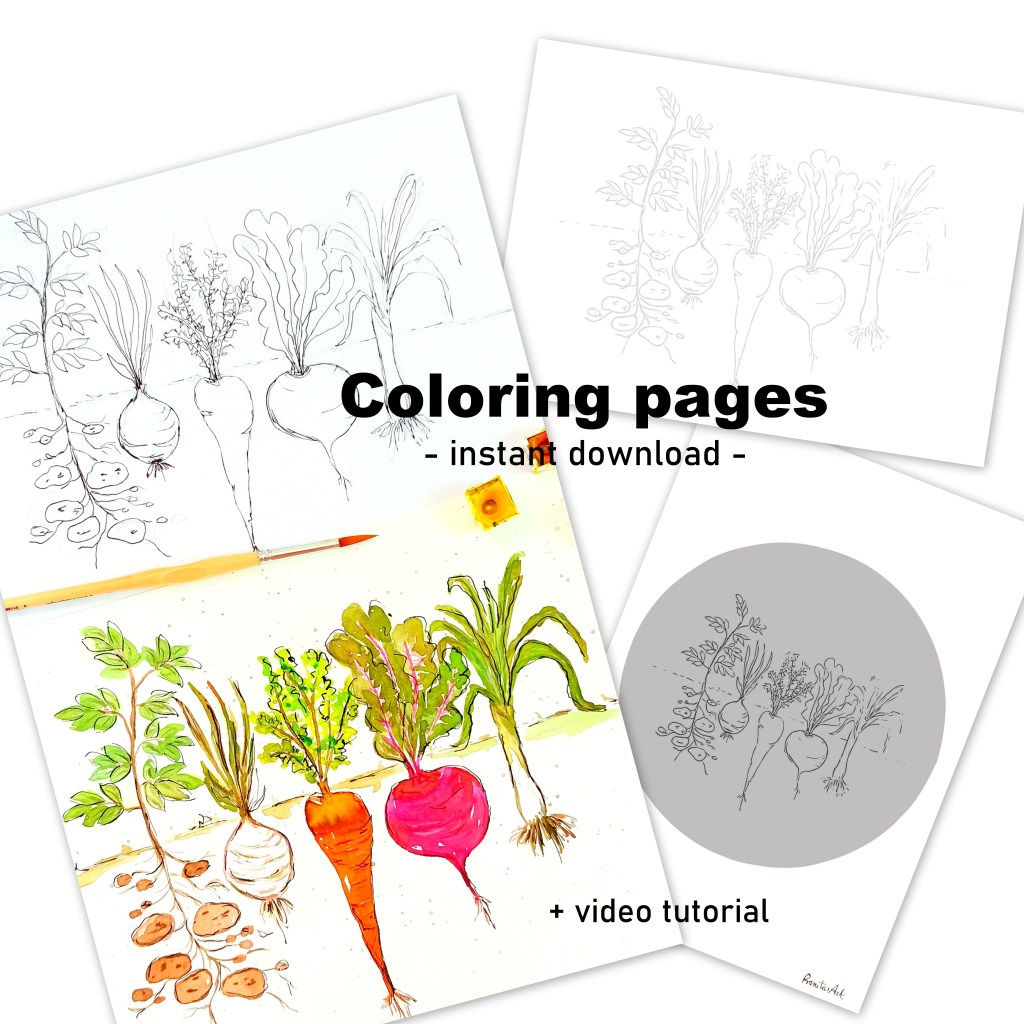
ES → en el post de hoy les quiero enseñar este hermoso dibujo sobre tubérculos en el huerto que pinté con acuarelas. Preparé un video completo donde pueden ver paso a paso como dibujar y pintar estos 5 tubérculos basicos. Un dibujo geniál, ideal para esta epoca del año donde nos ponemos manos a la obra en la jardinería. Por ejemplo ideal para colgar en la cocina.
EN → in today’s post I want to show you this beautiful drawing of tubers in the garden that I painted with watercolors. I prepared a complete video where you can see step by step how to draw and paint these 5 basic tubers. A great drawing, ideal for this time of year when we get to work gardening. For example, ideal to hang in the kitchen.
DE → im heutigen Beitrag möchte ich euch diese wunderschöne Zeichnung von Knollengemüse im Beet zeigen, die ich mit Wasserfarben gemalt habe. Ich habe ein komplettes Video vorbereitet, in dem Ihr Schritt für Schritt sehen könnt, wie Ihr diese 5 Grundknollen zeichnet und anmalt. Eine tolle Zeichnung, ideal für diese Jahreszeit, in der wir mit der Gartenarbeit beginnen. Ideal zum Beispiel zum Aufhängen in der Küche.
ES → preparé un descargable en tamaño A4, A5 y también para quien le guste bordar. Pueden descargarlo en tienda en Etsy. les dejo el link → https://ranitasart.etsy.com/listing/1706121968
EN → I prepared a downloadable in size A4, A5 and also for those who like to embroider. You can download it in the Etsy store. I leave you the link → https://ranitasart.etsy.com/listing/1706121968
DE → Ich habe eine herunterladbare Datei in der Größe A4, A5 und auch für diejenigen vorbereitet, die gerne sticken. Sie können es im Etsy-Shop herunterladen. Ich hinterlasse Ihnen den Link → https://ranitasart.etsy.com/listing/1706121968
ES → Materiales :
Descargables o propios sketch
Acuarelas ( porej. de Winsor and Newton o similar )
Papel para acuarelas de 180 gr. a 300 gr. ( porej. Hahnemühle o similar )
Pincel mediano nr. 6 y fino Nr. 1 de punta redonda
agua limpia
papel de cocina
tinta negra
pluma
lapiz
papel para practicar
lapices de colores
goma de borrar
EN → Materials:
Downloadable or own sketch
Watercolors (e.g. Winsor and Newton or similar)
180 gr watercolor paper. at 300 gr. (e.g. Hahnemühle or similar)
Medium brush no. 6 and fine Nr. 1 round tip
clean water
kitchen paper
black ink
feather
pencil
practice paper
colored pencils
eraser
DE → Materialien:
Downloads oder eigene Skizze
Aquarelle (z. B. Winsor und Newton oder ähnlich)
180 g Aquarellpapier. bei 300 gr. (z.B. Hahnemühle o.ä.)
Mittlerer Pinsel Nr. 6 und feine Nr. 1 Rundspitze
sauberes Wasser
Küchenpapier
schwarze Tinte
Feder
Bleistift
Übungspapier
Buntstifte
Radiergummi
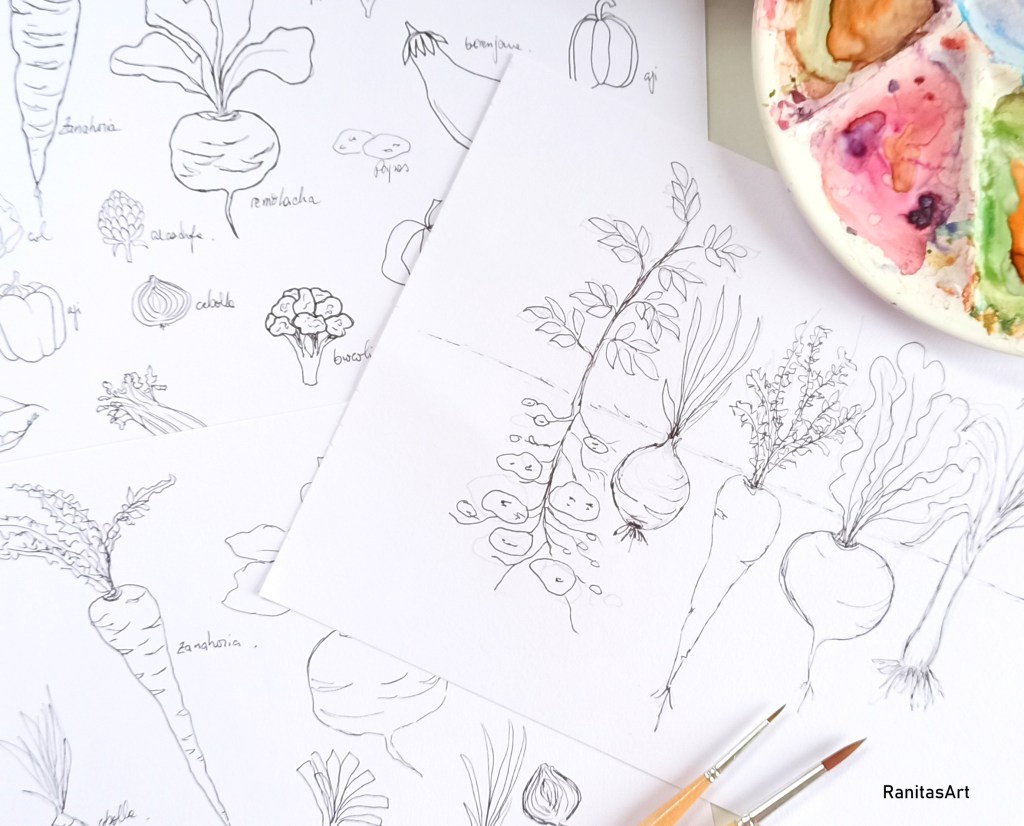
ES → Estos son algunos de mis bocetos antes de comenzar a pintar. Normalmente utilizo papel de impresora, lapiz y microfibra negra. Pueden buscar inspiración por ejemplo si tienen un propio huerto de sacar fotografías o sentarse a bocetar directamente delante, o en mi caso junto recortes de revistas, hago fotografías de las verduras o busco inspiración en pinterest.
EN → These are some of my sketches before I started painting. I normally use printer paper, pencil and black fine liner. They can look for inspiration, for example if they have their own garden, to take photographs or sit and sketch directly in front of it, or in my case I put together magazine clippings, take photographs of the vegetables or look for inspiration on Pinterest.
DE → Dies sind einige meiner Skizzen, bevor ich mit dem Malen begann. Normalerweise verwende ich Druckerpapier, Bleistift und schwarze Mikrofaser. Ihr könnt nach Inspiration suchen, zum Beispiel wenn Ihr einen eigenen Garten habt, Fotos machen oder direkt davor sitzen und skizzieren, oder in meinem Fall stelle ich Zeitungsausschnitte zusammen, fotografiere das Gemüse oder suche auf Pinterest nach Inspiration.
ES → Aquí les dejo el video, les recomiendo que lo miren una vez completo y luego vuelvan a mirarlo paso a paso haciendo pausas, para poder seguir los pasos correctamente . Disfruten del video y si desean pueden subir algunos de sus dibujos en instagram con el #paintingwithranitasart
EN → Here I leave the video, I recommend that you watch it once in its entirety and then watch it again step by step, pausing, to be able to follow the steps correctly. Enjoy the video and if you want you can upload some of your drawings on Instagram with #paintingwithranitasart.
DE → Hier hinterlasse ich euch das Video, ich empfehle euch, es einmal vollständig anzusehen und es dann Schritt für Schritt noch einmal mit Pause anzusehen, um die Schritte richtig befolgen zu können. Genießt das Video und wenn Ihr möchtet, könnt Ihr einige euren Zeichnungen auf Instagram mit #paintingwithranitasart hochladen.
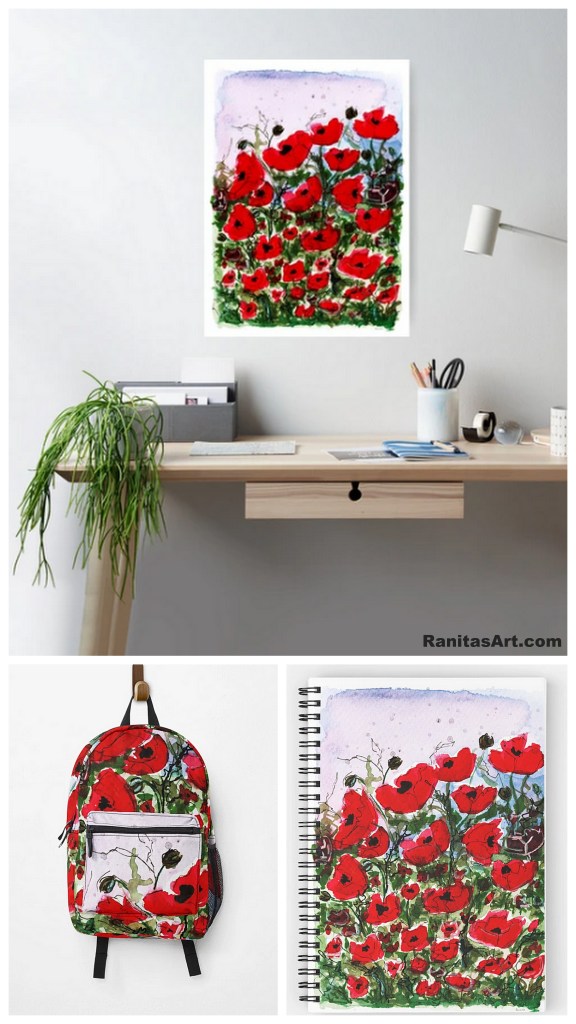
ES → En el post de hoy les quiero enseñar un video donde les muestro como pinto un campo de amapolas sin boceto previo.
EN → In today’s post I want to show you a video where I show you how I paint a field of poppies without a prior sketch.
DE → Im heutigen Beitrag möchte ich euch ein Video zeigen, in dem ich euch zeige, wie ich ohne vorherige Skizze eine Mohnblumen Wiese male.
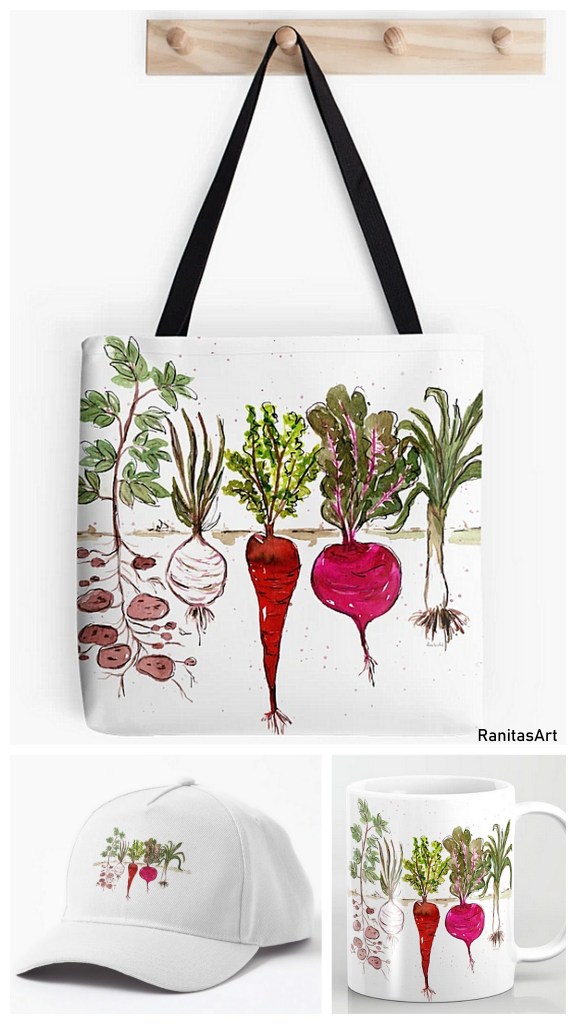
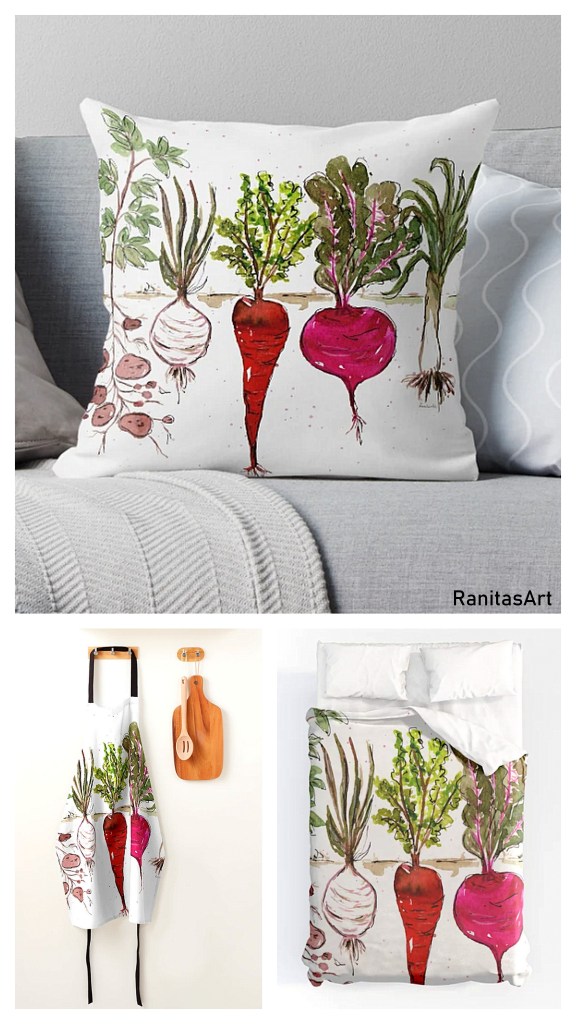
ES → Normalmente se pinta el fondo primero, pero en este caso para poder lograr que queden manchas blancas que rodean las amapolas, pinté primero las flores , luego el fondo y por último todos los detalles de las hojas. Disfruten del video y les dejo algunos links para que puedan ver como queda el dibujo sobre algunos productos.
EN → Normally the background is painted first, but in this case in order to achieve white spots that surround the poppies, I painted the flowers first, then the background and finally all the details of the leaves. Enjoy the video and I leave you some links so you can see how the painting looks on some products.
DE → Normalerweise wird zuerst der Hintergrund gemalt, aber um in diesem Fall um weiße Flecken zu erzielen, die die Mohnblumen umgeben, habe ich zuerst die Blumen gemalt, dann den Hintergrund und zuletzt alle Details der Blätter. Genießt das Video und ich hinterlasse euch einige Links, damit Ihr sehen könnt, wie die Zeichnung auf einigen Produkten aussieht.
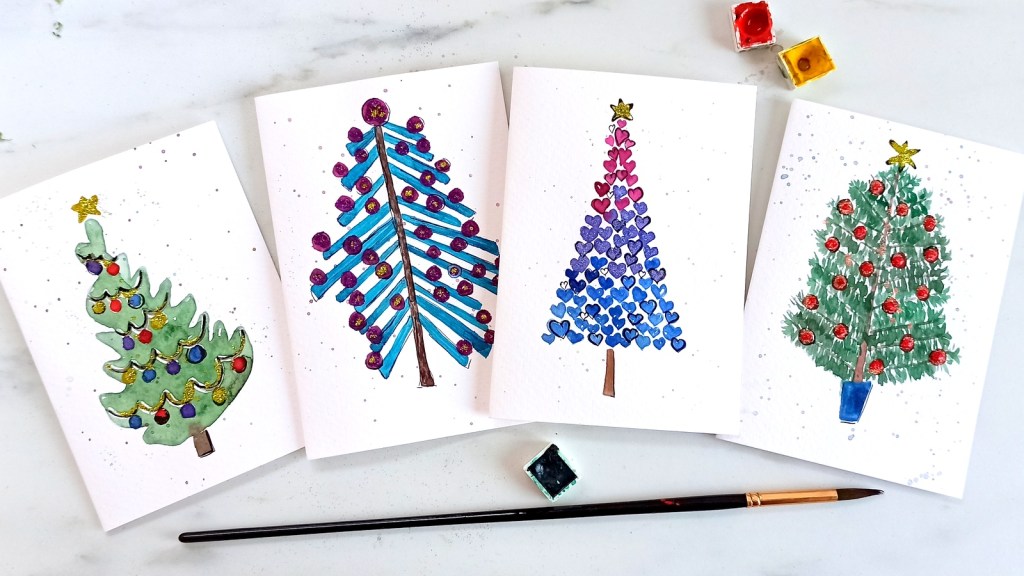
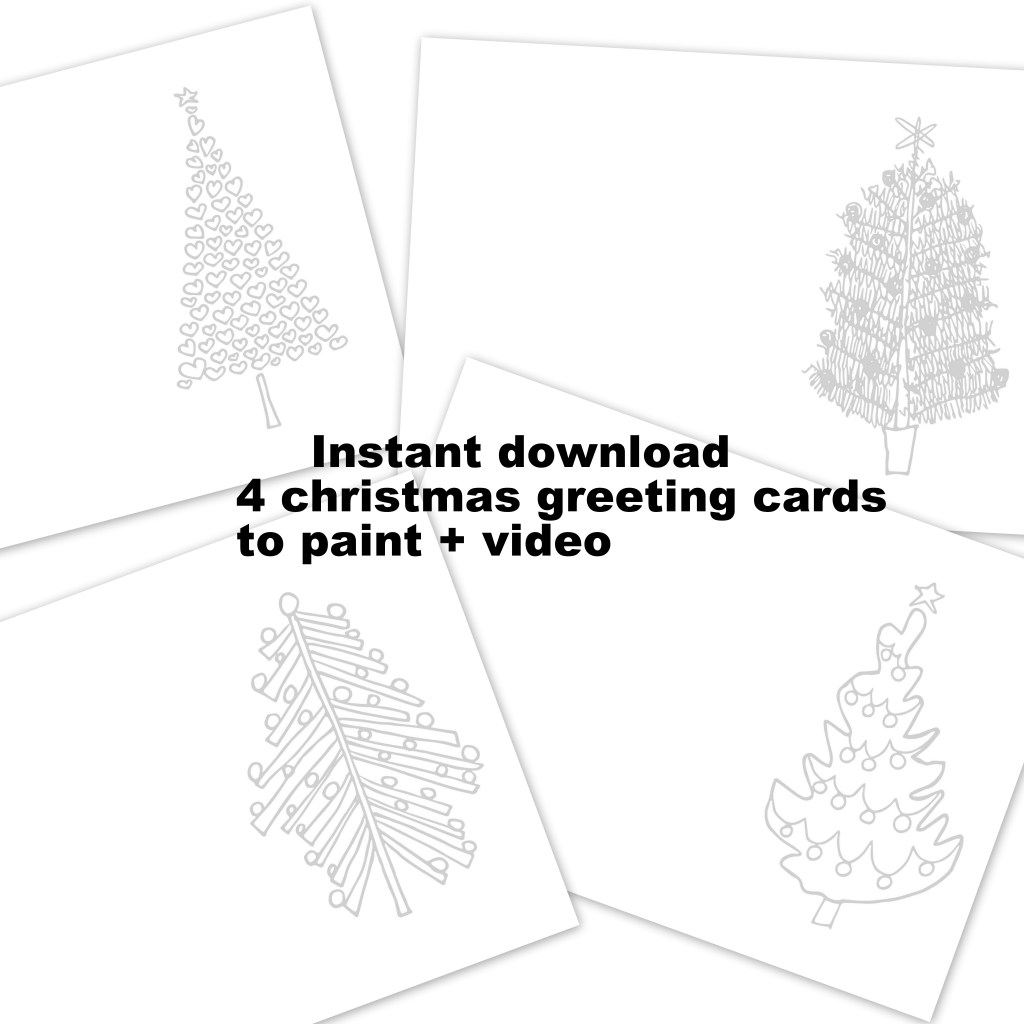
EN → In today’s post I show you a step-by-step video on how to paint 4 different Christmas trees. I prepared the sketches so that you can download them on the page and I can paint them. They are in A6 and A5 card form in a very light gray color so you can paint directly over them. Ideally, print the sketch directly on 180 gr watercolor paper. – 300 gr. . In the video I show you how to paint the 4 Christmas trees with watercolors, decorating them at the end with glitter. You can also paint them with colored pencils, in black and white with fineliner, with gouache or acrylics.
Each tree has a different technique and steps to follow. You can go forward and rewind the video to see each tree separately, since the techniques get mixed up a little, because you have to pay attention to the drying between each step. Enjoy the video and I’ll leave you some tips so you can do the job better.
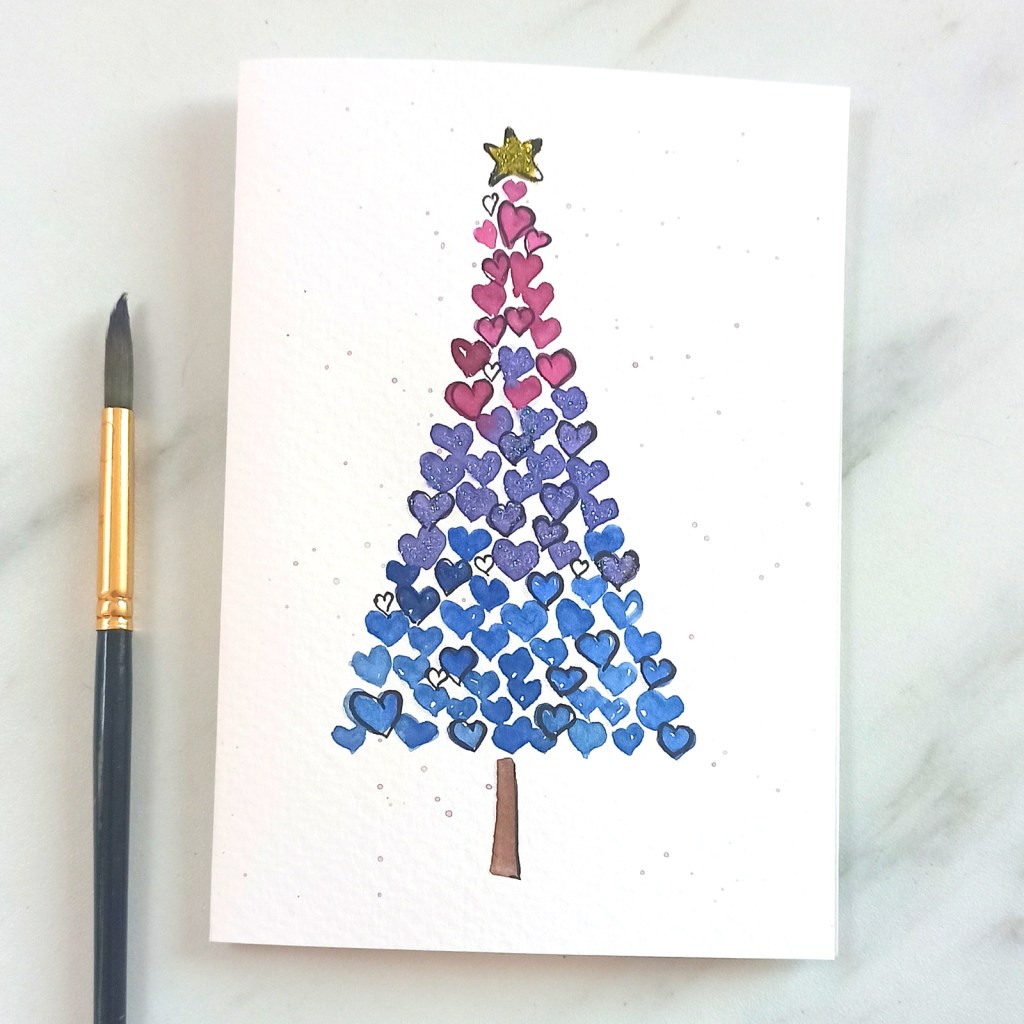
ES → En el post de hoy les muestro un video paso a paso de como pintar 4 diferentes árboles navideños. Preparé los bocetos para que puedan descargarlos en la página y pueda pintarlos. Están en forma de tarjeta A6 y A5 en un color gris muy claro para que puedan pintar directamente por encima. Ideal es imprimir el boceto directamente sobre papel para acuarelas de 180 gr. a 300 gr. . El el video les muestro como pintar los 4 árboles navideños con acuarelas, decorandolos al final con brillantina. También pueden pintarlos con lápices de colores, en blanco y negro con microfibra, con gouache o acrílicos.
Cada árbol tiene una técnica y pasos diferentes a seguir. Pueden ir adelantando y retrocediendo el video para ver cada árbol por separado, ya que las técnicas se van entremezclando un poco, porque hay que prestar atención al secado entre medio de cada paso. Disfruten del video y les dejo algunos tips para que puedan realizar mejor el trabajo.
DE → Im heutigen Beitrag zeige ich euch ein Schritt-für-Schritt-Video, wie Ihr 4 verschiedene Weihnachtsbäume anmalt. Ich habe die Skizzen so vorbereitet, dass Ihr sie auf der Seite herunterladet und sie anmalen könnt, im A6- und A5-Kartenformat in einem sehr hellgrauen Farbton erhältlich, sodass Ihr sie direkt übermalen könnt. Druckt ir die Skizze idealerweise direkt auf 180 g – bis 300 g. Aquarellpapier aus . Im Video zeige ich euch, wie Ihr die 4 Weihnachtsbäume mit Wasserfarben anmalst und sie zum Schluss mit Glitzer verzierst. Ihr können sie auch mit Buntstiften, in Schwarz und Weiß mit Fineliner, mit Gouache oder Acrylfarben anmalen.
Für jeden Baum gibt es unterschiedliche Techniken und Schritte. Ihr könnt das Video vor- und zurückspulen, um jeden Baum einzeln zu sehen, da die Techniken etwas durcheinander geraten, da Ihr zwischen den einzelnen Schritten auf das Trocknen achten müsst. Genießt das Video und ich gebe euch einige Tipps, damit Ihr die Arbeit einfacher machen könnt.
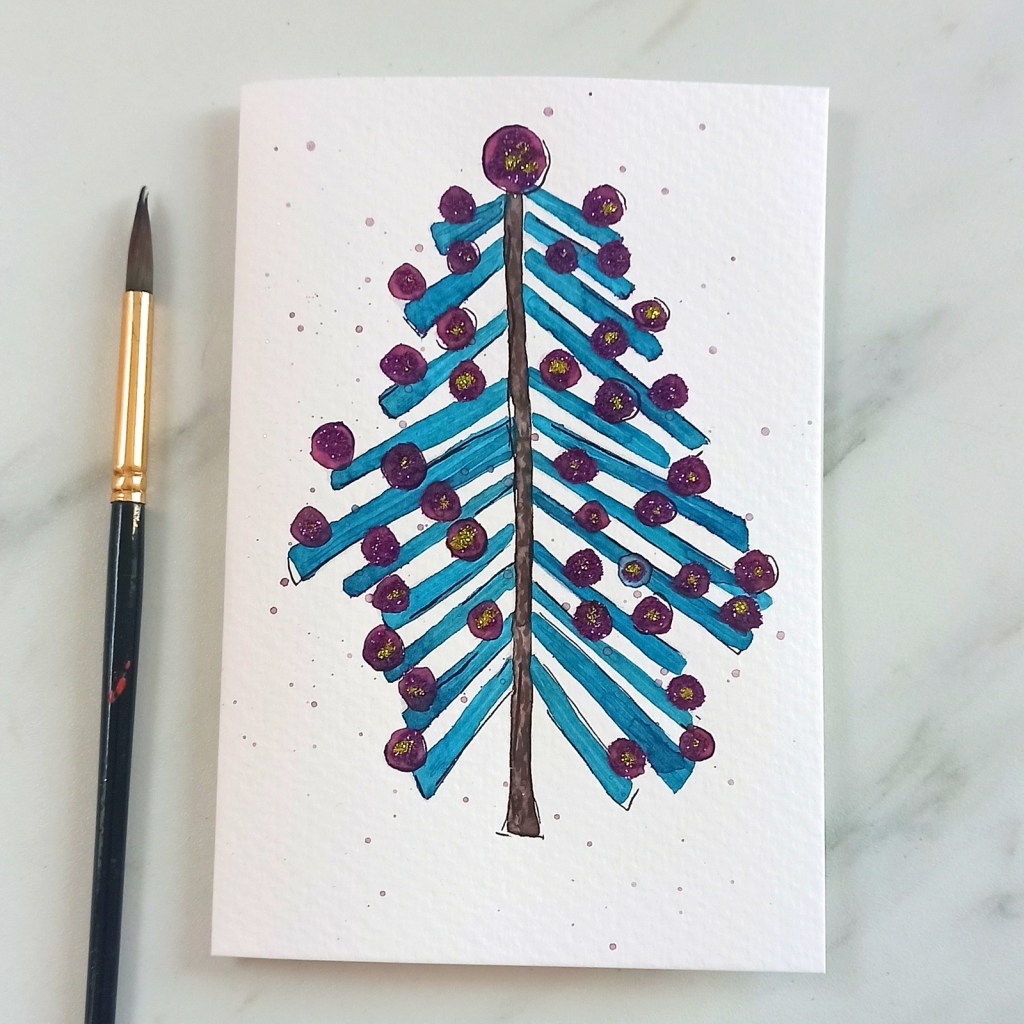
EN → Tree 1: to paint this Christmas tree we will begin to paint the branches in turquoise blue and let the trunk dry. Then we painted the balls in dark purple and let them dry again. Then we marked some details in black ink and splashed the spots with watercolor and a brush, hitting it a little so that the paint fell. Once the paint is completely dry, we will apply the glitter with glue.
ES → Árbol 1 : para pintar este árbol navideño comenzaremos a pintar las ramas en color azul turqueza y el tronco de dejamos secar. Luego pintamos las bolas en color violeta oscuro y dejamos secar nuevamente. Despué marcamos algunos detalles en tinta negra y salpicamoes mancas con acuarela aguada y un pincel, golpeandolo un poco para que caiga la pintura. Una vez que la pintura esté completamente seca, aplicaremos la brillantina con pegamento.
DE → Baum 1: Um diesen Weihnachtsbaum zu bemalen, fangen wir an, die Zweige türkisblau zu bemalen und lassen den Stamm trocknen. Anschließend werden wir die Kugeln dunkellila bemalen und wieder trocknen lassen. Dann werden wir einige Details mit schwarzer Tinte markieren und die Karte mit Wasserfarbe und einem Pinsel bespritzt, wobei wir leicht darauf klopften, damit die Farbe fällt. Sobald die Farbe vollständig getrocknet ist, tragen wir den Glitzer mit Kleber auf.
EN → Tree 2: first we will paint the balls and the garland with masking fluid and let them dry. Then we will paint the entire tree with green watercolor and let it dry. Then we will remove the masking fluid and paint the balls in different colors. We will paint the garlands and the stems brown. Next we will add details in ink and drops of watercolor wash throughout the card. Lastly we will add details with glitter and glue.
ES → Árbol 2: primeramente pintaremos con masking fluid las bolas y la girnalda y dejaremos secar. Luego pintaremos con acuarela verde todo el árbol y dejamos secar. Despuésquitaremos el masking fluid y pintaremos las bolas de diferentes colores. Las girnaldas y el tallos lo pintaremos de marrón. A continuación agregaremos detalles en tinta y gotas de acuarela aguada por toda la tarjeta. Por último agregaremos detalles con brillantina y pegamento.
DE → Baum 2: Zuerst bemalen wir die Kugeln und die Girlande mit Maskierflüssigkeit und lassen wir trocknen. Anschließend bemalen wir den gesamten Baum mit grüner Wasserfarbe und lassen ihn trocknen. Anschließend entfernen wir die Maskierungsflüssigkeit und bemalen die Kugeln in verschiedenen Farben. Wir werden die Girlanden und die Stiele braun bemalen. Als Nächstes werden wir auf der gesamten Karte Details mit Tinte und Wasserfarbentropfen hinzufügen. Zuletzt fügen wir Details mit Glitzer hinzu.
ES → Árbol 3: pintaremos el árbol de corazones en forma de degradé con 3 colores de la misma familia. Yo elegí azúl, violeta y fuxia. Una vez que los colores estén secos y hayamos pintado el tallo y la estrella, agregaremos detalles en tinta y algunos corazones extras solo en tinta. Luego con un pinsel pequeño y acuarela aguada agregaremos manchas de acuarela y dejaremos secar. Por último con pegamento pegaremos la brillantina.
EN → Tree 3: we will paint the heart tree in a gradient shape with 3 colors from the same family. I chose blue, violet and fuxia. Once the colors are dry and we have painted the stem and star, we will add ink details and some extra ink-only hearts. Then with a small pinsel and diluted watercolor we will add watercolor spots and let it dry. Finally, with glue we will stick the glitter.
DE → Baum 3: Wir werden den Herzbaum in einer Verlaufsform mit 3 Farben aus derselben Familie bemalen. Ich habe mich für Blau, Violett und Fuchsia entschieden. Sobald die Farben trocken sind und wir den Stiel und den Stern bemalt haben, fügen wir Tuschedetails und einige zusätzliche Herzen nur mit Tusche hinzu. Dann fügen wir mit einem kleinen Pinsel und verdünnter Wasserfarbe Aquarellflecken hinzu und lassen es trocknen. Zum Schluss kleben wir den Glitzer mit Kleber auf.
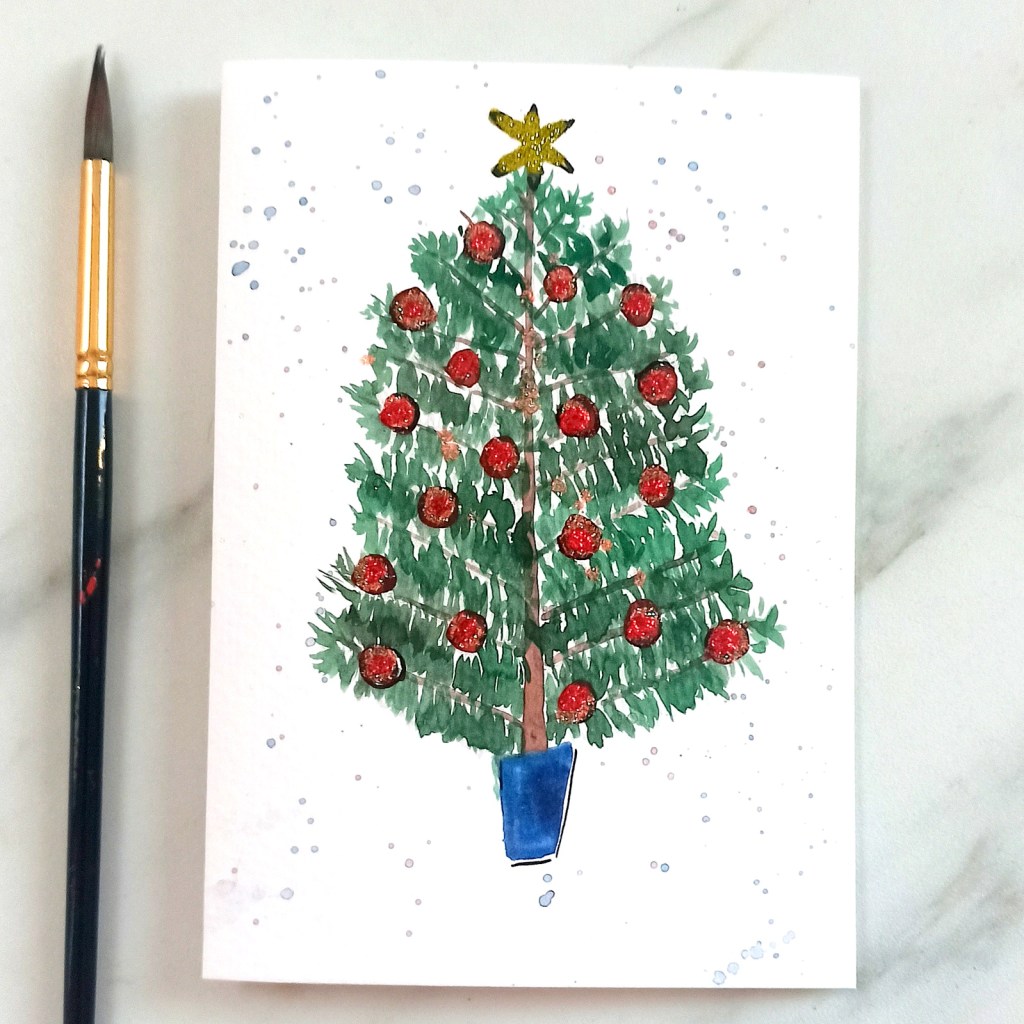
ES → Árbol 4 : Primero pintaremos el tallo y las ramas en marrón, además de la maceta y la estrella y dejaremos secar. Luego pintaremos las bolas en color rojo y volvemos a dejar secar. Después pintaremos las ramas verdes y nuevamente dejaremos secar. Agregaremos manchas aguadas en acuarela y por último pegaremos la brillantina.
EN → Tree 4: First we will paint the stem and branches in brown, as well as the pot and the star and let it dry. Then we will paint the balls red and let them dry again. Then we will paint the branches green and let them dry again. We will add watercolor spots and finally we will glue the glitter.
DE → Baum 4: Zuerst bemalen wir den Stamm und die Zweige in Braun, sowie den Topf und den Stern und lassen ihn trocknen. Anschließend bemalen wir die Kugeln rot und lassen sie wieder trocknen. Anschließend werden wir die Zweige grün anmalen und wieder trocknen lassen. Wir werden Aquarellflecken hinzufügen und zum Schluss den Glitzer aufkleben.
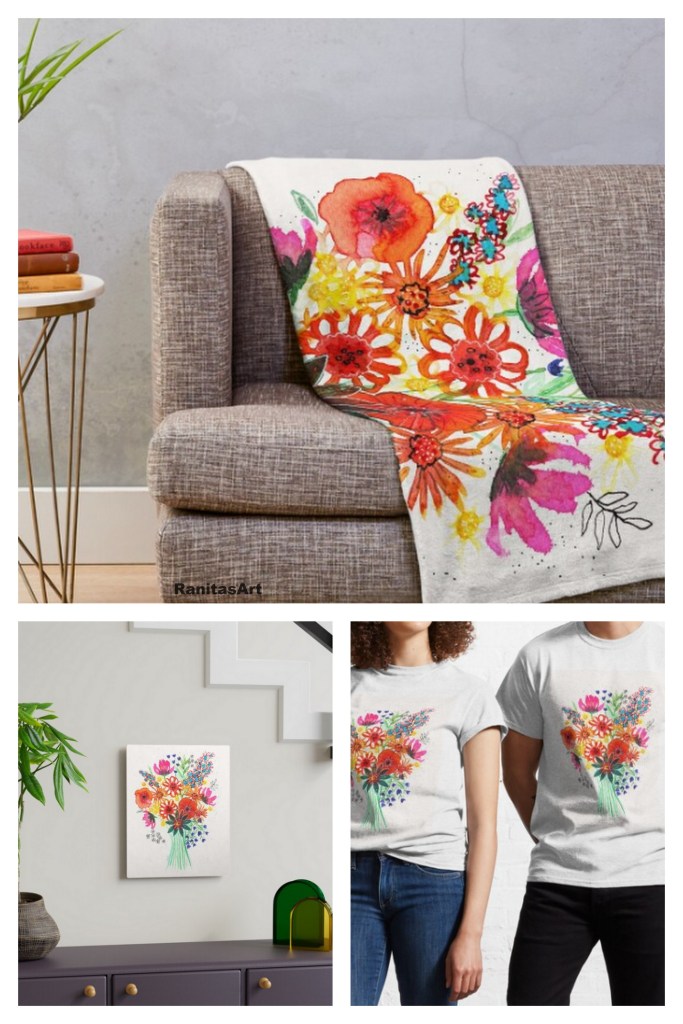
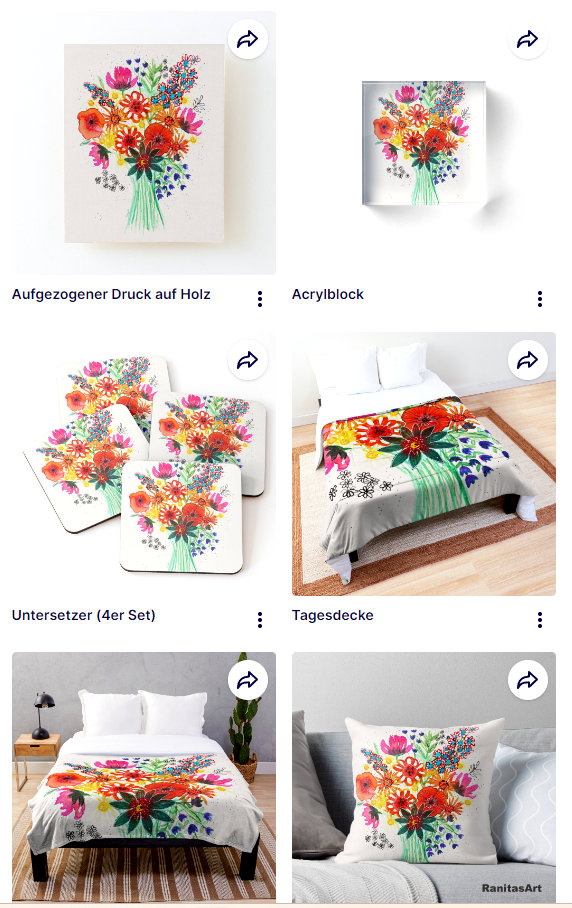
EN → In today’s post I wanted to talk to you about this video, where I show you how to paint a bouquet of flowers step by step without a previous sketch. The interesting thing about this video tutorial is that I show how to paint different types of flowers. The important thing when painting a bouquet of flowers is the balance between the flowers. There may be a central flower and the others are usually repeated 2 or 3 times. It is a video with only music and in Timelapse format. Enjoy the video ♥ !
I leave you some links, where I show you how the finished drawing looks on different surfaces.
ES → En el post de hoy quería hablarles sobre este video, donde les muestro como pintar un ramo de flores paso a paso sin boceto previo. Lo interesante de este video tutorial es que muestro como pintar diferentes tipos de flores. Lo importante cuando pintan un ramo de flores es el equilibrio entre las flores. Puede haber una flor central y las demás suelen repetirse 2 o 3 veces. Es un video con solo música y en formato Timelapse. Disfruten del video ♥ !
Les dejo algunos link, donde les muestro como queda el dibujo terminado sobre diferentes duperficies.
DE → Im heutigen Beitrag wollte ich euch über dieses Video sprechen, in dem ich euch Schritt für Schritt zeige, wie Ihr ohne vorherige Skizze einen Blumenstrauß malt. Das Interessante an diesem Video-Tutorial ist, dass ich zeige, wie man verschiedene Arten von Blumen malt. Das Wichtigste beim Malen eines Blumenstraußes ist die Balance zwischen den Blumen. Es kann eine zentrale Blüte geben und die anderen wiederholen sich normalerweise zwei- oder dreimal. Es ist ein Video nur mit Musik und im Timelapse Format. Viel Spaß mit dem Video ♥ !
Ich hinterlasse euch einige Links, in denen ich euch zeige, wie die fertige Zeichnung auf verschiedenen Oberflächen aussieht.